I know that this is not the hot thing to be discussed in these days where we have fluid integration between latest versions of CRM i.e. Dynamics 365 and SharePoint or D365 with other document management vendors but still this might come handy when your client has the on-premise to on-premise integration between Dynamics CRM and SharePoint.
Note: This is a comprehensive post, within couple of hours, it helps to get the custom grid build for Dynamics CRM – SharePoint integration and handle the document CRUD operations from CRM.
Targeted audience are Developers and Techhnical Consultants. First segment is for Functional Consultants as well.
SharePoint with Dynamics CRM
SharePoint is the obvious choice considering storing the documents and associating it with the Dynamics CRM since CRM isn’t designed to manage the documents. On the other hand, maintaining the documents in SharePoint have advantages like,
- Collaboration for non-CRM users to access documents.
- Leverage SharePoint document manager features like checking out/check in and version history.
- Provides the interface to support OneNote integration with CRM
- SharePoint can sync to your Desktop Library and Outlook and other many more.
When we talk about SharePoint integration there are two ways of integration,
- CRM List Component – only integration method available for on-premise SharePoint environments as they do not support server-based integration
- Server-based SharePoint Integration – Dynamics CRM Server to SharePoint Server (server-to-server) authentication so there is no need to install any additional components.
| SharePoint version | List component support | Server-based SharePoint integration support |
| SharePoint 2013 or SharePoint 2013 SP1 | Yes | No |
| SharePoint 2010 SP1 or SP2 | Yes | No |
| SharePoint Online | Yes | Yes |
Refer here for Client-based SharePoint integration vs. Server-based SharePoint integration. Without delaying further, let’s talk about the On-Premise CRM to On-Premise SharePoint integration.
But why custom grid?
As you know about Chrome’s famous modal-dialog issue which doesn’t allow uploading a new document using the OOB Sharepoint grid in CRM. To give some background, Google Chrome version 35 has deprecated the JavaScript method showModalDialog() and this is a core method used in dialog-return scenarios in Microsoft Dynamics CRM. Not all the client’s are happy with the registry change workaround which will the fix. Refer here for the details.
In this case, where the registry changes can’t be done/not allowed on client’s machine, we can go ahead building a custom page (aspx) and embedded in the iFrame on the form or in the navigation pane.
How it looks?
Once you built, it looks like this (of course, depends on the style you use).
- Using jQuery block UI on load to show a custom message with loader for better user adoption. Note: You can have your custom styles as well instead of block UI and have used the same .gif that CRM uses.
2. View list of documents under a tab:

3. On deleting the selected documents, you can have the custom messages and on confirmation delete the file and route to the same page with the valid query string parameters.
4. Upload page with just a file upload control and a couple of buttons. On Submit, the document is uploaded to the SharePoint, shows a confirmation alert and the popup and window are closed.

Steps to build it:
- Design the Home page (aspx) with grid and buttons to Add, Delete and Edit if needed.
- Upload page (aspx with FileUpload control).
- Interface to Get SharePoint documents, Upload SharePoint document and Delete SharePoint document. I’m using the SharePoint Client Object Model (CSOM).
- JavaScript (web resource) to get the required data and set it to the iFrame (pass it to the aspx page).
- Plugin – to create a folder in SharePoint on the record created.
1. Home page:
Home page has an Asp.net Gridview to show the documents and 2 to 3 buttons (add, delete, edit), based on the business scenario.
Grid View:
<asp:GridView ID="gvResults" ShowHeaderWhenEmpty="true" OnRowCommand="gvResults_RowCommand" runat="server" CellPadding="4" CssClass="GridViewStyle" Width="100%" GridLines="None" HeaderStyle-CssClass="headerow" FooterStyle-CssClass="footerrow" RowStyle-CssClass="ms-crm-List-DataCell-Lite"
AutoGenerateColumns="False" OnSorting="gvResults_Sorting" OnDataBound="gvResults_DataBound" AllowSorting="true" OnPageIndexChanging="gvResults_PageIndexChanging" DataKeyNames="ID" AllowPaging="True" PageSize="10">

<PagerStyle HorizontalAlign="Center" />
<Columns>
<asp:TemplateField ItemStyle-Width="5%">
<HeaderTemplate>
<asp:CheckBox runat="server" ID="HeaderLevelCheckBox" />
</HeaderTemplate>
<ItemTemplate>
<asp:CheckBox runat="server" ID="RowLevelCheckBox" />
</ItemTemplate>
</asp:TemplateField>

<asp:HyperLinkField ControlStyle-CssClass="ms-crm-gridurl" DataTextField="Name" DataNavigateUrlFields="File Link" DataNavigateUrlFormatString="{0}"
HeaderText="Name" ItemStyle-Width="50%" Target="_blank" ControlStyle-Font-Underline="true" />
<asp:BoundField SortExpression="File Link" DataField="File Link" HeaderText="File Link" Visible="false" />
<asp:BoundField SortExpression="Uploaded Date" DataField="Uploaded Date" HeaderText="Uploaded Date" ItemStyle-Width="20%" />
<asp:BoundField SortExpression="Uploaded By" DataField="Uploaded By" HeaderText="Uploaded By" ItemStyle-Width="20%" />
<asp:BoundField SortExpression="Regarding Guid" DataField="Regarding Guid" HeaderText="Regarding Guid" Visible="false" />
<asp:BoundField SortExpression="ID" DataField="ID" HeaderText="ID" Visible="false" />
<asp:TemplateField ItemStyle-Width="5%">
<HeaderTemplate>
<a title="Refresh list" runat="server" id="refreshButtonLink" href="#" onserverclick="Refresh_Click">
<img title="Refresh list" class="ms-crm-ImageStrip-grid_refresh"
id="grid_refresh" style="cursor: pointer; right: 10px;" alt="Refresh list"
src="/_imgs/imagestrips/transparent_spacer.gif">
</a>
</HeaderTemplate>
</asp:TemplateField>
</Columns>
</asp:GridView>
In the code behind, the grid view is populated by the data retrieved from the SharePoint. To retrieve the files from the SharePoint, document location details (available within CRM) of that specific record needs to retrieve. To understand how SharePoint Document Locations work, refer to Debajit’s blog.
To retrieve document location and pass it to the interface:
using (var context1 = new ServiceContext(service))
{
var docLoc = (from doc in context1.SharePointDocumentLocationSet
join loc in context1.SharePointDocumentLocationSet on doc.ParentSiteOrLocation.Id equals loc.Id
where doc.StateCode == 0 //Check for Status == Active
&& loc.RelativeUrl == schemaName //retrieve document locations for the specific entity
&& doc.RegardingObjectId.Id == regardingObjectId
select doc).ToList();

var docLocation = docLoc.FirstOrDefault();
if (docLocation != null)
{
string.Format("Relative Url: {0}", docLocation.RelativeUrl), "GetDocumentsFromSP");
ViewState["relativeUrl"] = docLocation.RelativeUrl; //needs to be passed to the upload page
listItems = CommonClass.GetFileFromSharepoint(service, schemaName, schemaName.GetDisplayName(), docLocation.RelativeUrl);
}
}
You needed schema name, display name and the relative URL (from document location) to fetch the documents from the SharePoint. Once the result is returned it can be bind to the Grid.
2. Upload Page:
It has a FileUpload control and a Submit button. At the code behind,
if (new_fileupload.HasFile && new_fileupload.PostedFile.ContentLength <= Convert.ToInt32(ConfigurationManager.AppSettings["MaxFileSize"]))
{
byte[] docstream = null;
fullfilename = new_fileupload.PostedFile.FileName;
docstream = new_fileupload.FileBytes;
string[] arrfullfilename = fullfilename.Split('\\');
string filenamewithext = arrfullfilename[arrfullfilename.Count() - 1];
string filename = filenamewithext.Split('.')[0];
try
{
string fileurl = CommonClass.UploadToSharePoint(clsvObj_CRMSvcProxy, displayName, schemaName, relativeUrl, filenamewithext, docstream);
if (!string.IsNullOrEmpty(fileurl))
{
string script = "alert('Document uploaded successfully. Please refresh the table to view the recently uploaded document.');";

ClientScript.RegisterClientScriptBlock(this.GetType(), "Alert", script, true);

ScriptManager.RegisterStartupScript(this, this.GetType(), "Close_Window", "self.close();", true);//this will close the page on button click
}
}
3. SharePoint Interfaces
This segment has the key logic for the CRUD operations for the SharePoint documents.
Upload a new document to SharePoint:
SharePoint’s elevated credentials is used for impersonation to do the operations but the actual user’s name should be seen in the grid’s Uploaded By and Modified By colums respectively. To achieve that, the current CRM user’s name is updated back to the SharePoint’s Author and Editor fields immediately after a successful upload.
internal static string UploadToSharePoint(IOrganizationService service, string title, string docLocationUrl, string relativeUrl, string fullfilename, byte[] documentStream)
{
string fullpath = string.Empty;
try
{
string siteURL = ConfigurationManager.AppSettings["SPURL"].ToString(); // Get SharePoint URL from Host File
fullpath = string.Format("{0}/{1}/{2}/{3}", siteURL, docLocationUrl, relativeUrl, fullfilename); //this is the Absolute path for the document

using (ClientContext clientContext = new ClientContext(siteURL))
{
clientContext.Credentials = CommonClass.GetSPCredentials(); //get the SP's encryted credentials for authentication

Microsoft.SharePoint.Client.List documentsList = clientContext.Web.Lists.GetByTitle(title);
clientContext.Load(documentsList);

//Get Document List
var fileCreationInformation = new FileCreationInformation();

//Assign to content byte[] i.e. documentStream
fileCreationInformation.ContentStream = new MemoryStream(documentStream);

//Allow owerwrite of document
fileCreationInformation.Overwrite = true;

//Upload URL
fileCreationInformation.Url = fullpath;
Microsoft.SharePoint.Client.File uploadFile = documentsList.RootFolder.Files.Add(
fileCreationInformation);


var userName = System.Security.Principal.WindowsIdentity.GetCurrent().Name.ToString();

User spUser = clientContext.Web.EnsureUser(userName);
clientContext.Load(spUser);
clientContext.ExecuteQuery();

//To maintain the current user's name as Created By and Modified By since the actual user is impersonated
uploadFile.ListItemAllFields["Author"] = spUser;
uploadFile.ListItemAllFields["Editor"] = spUser;
uploadFile.ListItemAllFields.Update();

clientContext.ExecuteQuery();
}
}
catch (Exception ex)
{
log.Error("Exception in the UploadToSharePoint() method. Message: " + ex.Message);
}
return fullpath;
}
Retrieve documents from SharePoint:
I have retrieved only the basic fields that are required, you can retrieve and show in the grid based on the business scenario.
Entity’s display name needs to be passed to get the documents by title, not the schema name
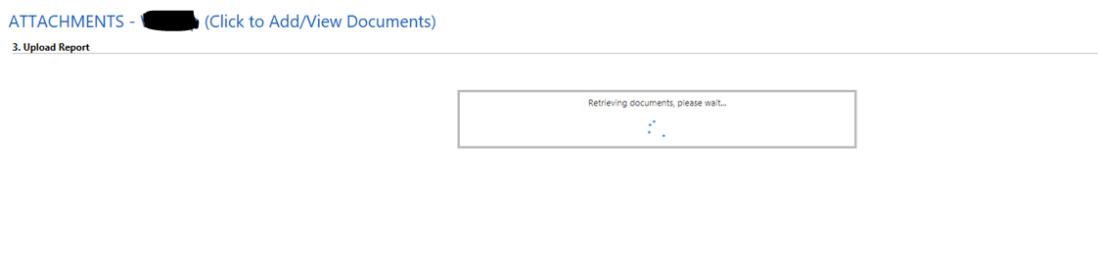
Have used jQuery block UI to achieve the ‘Retrieving documents..’ loader
internal static List<SPDocumentModel> GetFileFromSharepoint(IOrganizationService service, string schemaName, string listName, string folderName)
{
List<SPDocumentModel> spFiles = new List<SPDocumentModel>();
try
{
//TODO: change credential to configurable
string targetSite = ConfigurationManager.AppSettings["SPURL"].ToString();
ClientContext clientContext = new ClientContext(targetSite);
clientContext.Credentials = GetSPCredentials();
Web web = clientContext.Web;
clientContext.Load(web);
Microsoft.SharePoint.Client.List list = web.Lists.GetByTitle(listName);

CamlQuery caml = new CamlQuery();
caml.FolderServerRelativeUrl = string.Format("/{0}/{1}", schemaName, folderName);
SP.ListItemCollection listItems = list.GetItems(caml);
clientContext.Load(listItems);
clientContext.ExecuteQuery();

foreach (var listItem in listItems)
{
SPDocumentModel file = new SPDocumentModel();

if (listItem.FieldValues["FileLeafRef"] != null)
{
file.FileName = listItem.FieldValues["FileLeafRef"].ToString();
}
if (listItem.FieldValues["Created"] != null)
{
file.UploadDate = ((DateTime)listItem.FieldValues["Created"]).ToLocalTime();
}
if (listItem.FieldValues["FileRef"] != null)
{
file.FileLink = string.Format("{0}{1}", targetSite, listItem.FieldValues["FileRef"].ToString());
}
if (listItem.FieldValues["ID"] != null)
{
file.ID = listItem.FieldValues["ID"].ToString();
}
if (listItem.FieldValues["Author"] != null)
{
FieldUserValue fValue = listItem.FieldValues["Author"] as FieldUserValue;
file.CreatedBy = fValue.LookupValue;
}
spFiles.Add(file);
}

}
catch (Exception ex)
{
log.Error("Exception in the GetFileFromSharepoint() method. Message: " + ex.Message);
throw ex;
}
return spFiles;
}
Delete a document from SharePoint:
The checkboxes event should be handled properly in the grid so that on checking/unchecking the header checkbox, all rows are checked/unchecked and vice versa.
ID property is used as the key here to identify the documet that needs to be deleted.
internal static bool DeleteFileInSP(IOrganizationService service, string title, string id)
{

try
{
string siteURL = ConfigurationManager.AppSettings["SPURL"].ToString();
ClientContext clientContext = new ClientContext(siteURL);
clientContext.Credentials = CommonClass.GetSPCredentials();
SP.List oList = clientContext.Web.Lists.GetByTitle(title);

ListItem oListItem = oList.GetItemById(id);
oListItem.DeleteObject();
clientContext.ExecuteQuery();
}
catch (Exception ex)
{
log.Error(fullName + ": Unable to Delete from SharePoint:" + guidid.ToString() + " Error: " + ex.Message.ToString());
}
return true;

}
Once you got the aspx page built, just call it from the CRM form, bingo!
4. JavaScript (web resource) to get the required data and set it to the iFrame (pass it to the aspx page)
The web resource is added in the Form and triggered by the expansion of the Tab. The script will retrieve the relevant data, in my case, it was the entity’s schema name and guid and pass it to the iFrame.
iframeObject.setSrc(sharepointServerURL + "/SharePointCustomGrid.aspx?Id=" + recordId + "&schemaName=" + entitySchema);
The OOB SharePoint grid in CRM created a SharePoint folder when you navigate to the Documents area from the from navigation but in our case, since we are using a custom page, it is our responsibility to create a SharePoint folder. We are creating a SharePoint folder when the record is created in the CRM in Plugin.
5. Plugin – to create a folder in SharePoint on the creation of a record
- Create SharePoint document location in CRM if not available
if (_spDocLocId == Guid.Empty)
{
//There is no location so create one
_spDocLocId = CreateSharePointDocLocation(orgService, FolderName, entityID, entity.LogicalName, entityDisplayName);

//Get the abslouteURL from the doc location just created
string absouteUrl = GetAbslouteUrl(orgService, _spDocLocId);
// We still need to create a SharePoint folder
CreateSharePointFolder(absouteUrl, entityDisplayName);
}
private static Guid CreateSharePointDocLocation(IOrganizationService _serviceProxy, string FolderName, string entityID, string entityLogicalName, string entityDisplayName)
{
var _spParentLocId = GetSPParentID(_serviceProxy, entityLogicalName);
if (_spParentLocId == Guid.Empty)
{
var _spParentId = GetDefaultSharePointSite(_serviceProxy);
// Create Parent Document Location if It empty
SharePointDocumentLocation spParentDocLoc = new SharePointDocumentLocation
{
Name = entityDisplayName,
Description = null,
// Set the Parent Location ID
ParentSiteOrLocation = new EntityReference("sharepointsite", _spParentId),
RelativeUrl = entityLogicalName
};
// Create a SharePoint document location record named Documents on Default Site 1.
_spParentLocId = _serviceProxy.Create(spParentDocLoc);
}
// Instantiate a SharePoint document location object.
// Create default folder for Name
SharePointDocumentLocation spDocLoc = new SharePointDocumentLocation
{
Name = FolderName + "_" + entityID.Replace("-", "").ToUpper(),
Description = null,
// Set the Regarding Object id - in this case its a contact
RegardingObjectId = new EntityReference(entityLogicalName, new Guid(entityID)),

// Set the Parent Location ID
ParentSiteOrLocation = new EntityReference(SharePointDocumentLocation.EntityLogicalName, _spParentLocId),
RelativeUrl = FolderName + "_" + entityID.Replace("-", "").ToUpper()
};
// Create a SharePoint document location record named Documents on Default Site 1.
Guid _spDocLocId = _serviceProxy.Create(spDocLoc);

return _spDocLocId;

}
2. Retrieve absolute URL of the created SharePoint document location
private static string GetAbslouteUrl(IOrganizationService orgService, Guid _spDocLocId)
{
IOrganizationService _service = orgService;
RetrieveAbsoluteAndSiteCollectionUrlRequest retrieveRequest = new RetrieveAbsoluteAndSiteCollectionUrlRequest
{
Target = new EntityReference(SharePointDocumentLocation.EntityLogicalName, _spDocLocId)
};
RetrieveAbsoluteAndSiteCollectionUrlResponse retrieveResponse = (RetrieveAbsoluteAndSiteCollectionUrlResponse)_service.Execute(retrieveRequest);
return retrieveResponse.AbsoluteUrl.ToString();
}
3. Create a folder in the SharePoint
private static void CreateSharePointFolder(string docfolderUrl,string entityDisplayName)
{
if (docfolderUrl == String.Empty || docfolderUrl.IndexOf("/") == -1)
{
return;
}
try
{
// last part is the folder name
string folderName = docfolderUrl.Substring(docfolderUrl.LastIndexOf("/") + 1);
// remove the folder name
docfolderUrl = docfolderUrl.Replace("/" + folderName, "");
// get the document libray name
string docLib = docfolderUrl.Substring(docfolderUrl.LastIndexOf("/") + 1);
// now remove the doc lib to leave the sharepoint site url
string sharePointSiteUrl = docfolderUrl.Replace("/" + docLib, "");

listservice.Lists myLists = new listservice.Lists();
views.Views myViews = new views.Views();

myLists.Url = sharePointSiteUrl + "/_vti_bin/lists.asmx";
myViews.Url = sharePointSiteUrl + "/_vti_bin/views.asmx";
myLists.Credentials = new NetworkCredential(spuser, sppassword);
myViews.Credentials = new NetworkCredential(spuser, sppassword);
//myLists.UseDefaultCredentials = true;
//myViews.UseDefaultCredentials = true;

XmlNode viewCol = myViews.GetViewCollection(entityDisplayName);
XmlNode viewNode = viewCol.SelectSingleNode("*[@DisplayName='All Documents']");
string viewName = viewNode.Attributes["Name"].Value.ToString();

/*Get Name attribute values (GUIDs) for list and view. */
System.Xml.XmlNode ndListView = myLists.GetListAndView(entityDisplayName, viewName);

/*Get Name attribute values (GUIDs) for list and view. */
string strListID = ndListView.ChildNodes[0].Attributes["Name"].Value;
string strViewID = ndListView.ChildNodes[1].Attributes["Name"].Value;
// load the CAML query
XmlDocument doc = new XmlDocument();
string xmlCommand;
xmlCommand = "<Method ID='1' Cmd='New'><Field Name='FSObjType'>1</Field><Field Name='BaseName'>" + folderName + "</Field> <Field Name='ID'>New</Field></Method>";
XmlElement ele = doc.CreateElement("Batch");
ele.SetAttribute("OnError", "Continue");
ele.SetAttribute("ListVersion", "1");
ele.SetAttribute("ViewName", strViewID);

ele.InnerXml = xmlCommand;

XmlNode resultNode = myLists.UpdateListItems(strListID, ele);

// check for errors
NameTable nt = new NameTable();
XmlNamespaceManager nsmgr = new XmlNamespaceManager(nt);
nsmgr.AddNamespace("tns", "http://schemas.microsoft.com/sharepoint/soap/");
if (resultNode != null)
{ // look for error text in case of duplicate folder or invalid folder name
XmlNode errNode = resultNode.SelectSingleNode("tns:Result/tns:ErrorText", nsmgr);
if (errNode != null)
{
// Write error to log;
}
}
}
catch (Exception ex)
{
throw ex;
}
}
Hope the article is comprehensive and helps to build a custom grid for SharePoint and handle the CRUD operations.
Please leave your feedback in the comment section.
Do not forget to like and share this post. Happy Learning!

One thought on “CRM 2015 – Sharepoint Integration using Custom Grid”