
Microsoft has finally included the Editable Grid, one of the most requested features over the last several releases of Dynamics CRM in Dynamics 365. These grids offer rich inline editing in main grids and sub-grids so users can update the information they need, it is as simple as that! This post seems too long but this gives a complete guide on configuring the main grid and sub-grids and its complete features.
Main grid – Configuring:
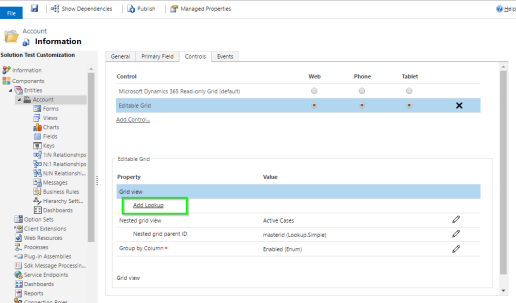
Step 1: Select the entity to which the editable grid to be enabled, click ‘Controls’ tab and click ‘Add Control’. Note: Editable grid can be added for custom entities as well, hurray!

Main grid – Features:
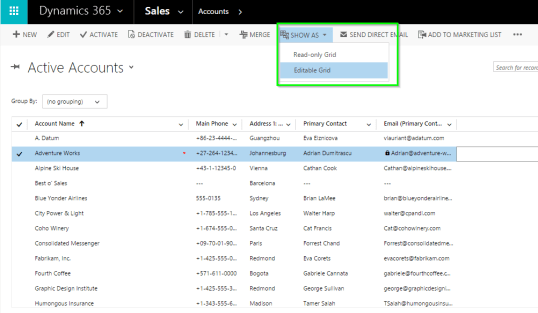
Visibility – Main grid will be displaying the editable grid, you can swap between read-only and editable grid and shown below.
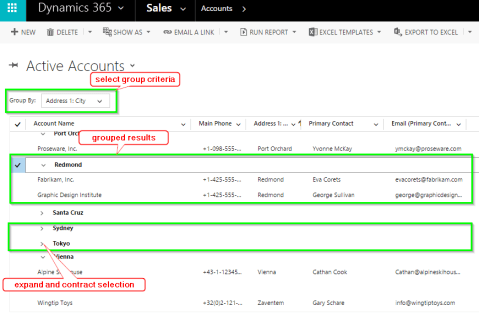
Grouping & Contracting Records – records can be grouped on a specific column, the grouped records can be contracted and expanded as well.
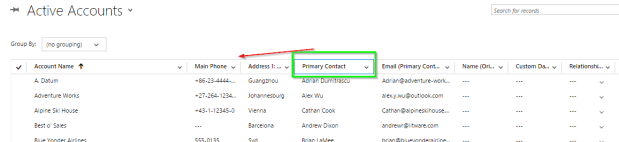
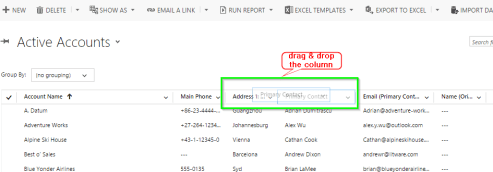
Rearranging Columns– just drag and drop 🙂
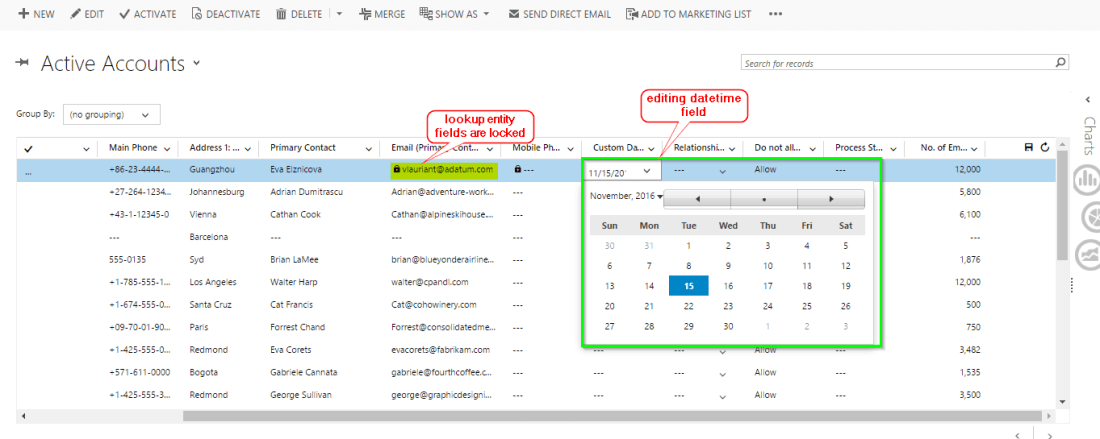
Step 5: Inline Editing – inline editing of all data type is possible (except related entity’s field), the user needs to explicitly click ‘Save’ icon. Note: Changes will not be saved automatically.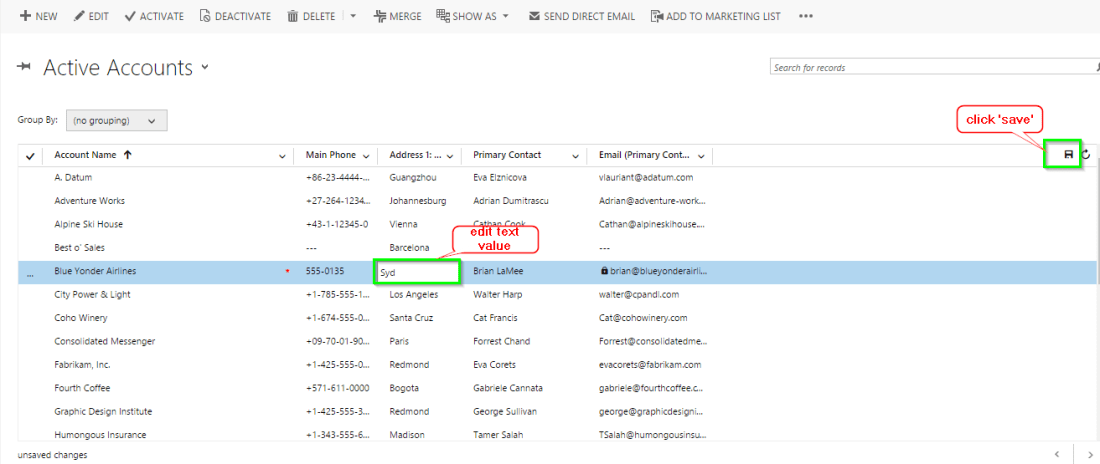
Related entity’s fields are locked for editing, obviously!
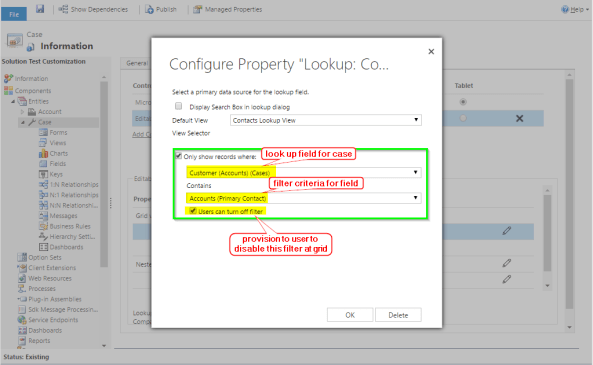
Configuring lookup property:
Step 1: Select the entity to which the editable grid to be enabled, click ‘Controls’ tab and click ‘Add Control’
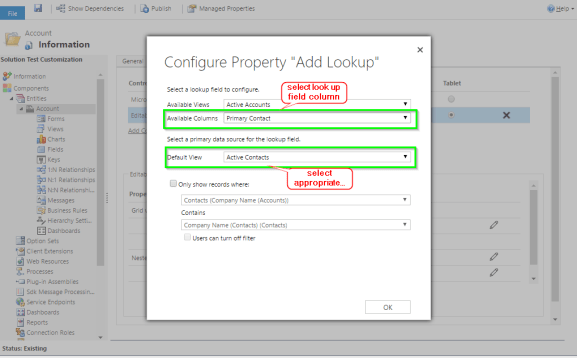
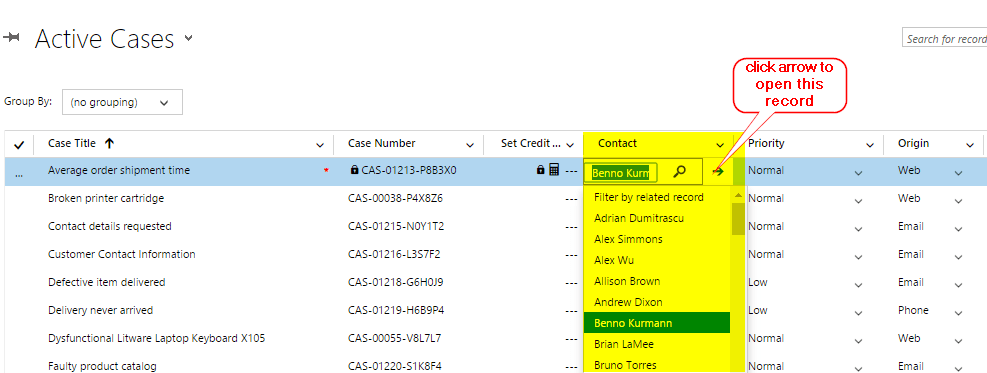
Step 2: Select the column has lookup (related entity), view for that lookup can be selected as well.
Selected view is loaded when lookup control is expanded.

To open the lookup record,
Step 3: Filter can be added for the lookup , select the field to be filtered against and the condition for that field. By checking the checkbox, users gets the provision to ‘turn off’ this filter.
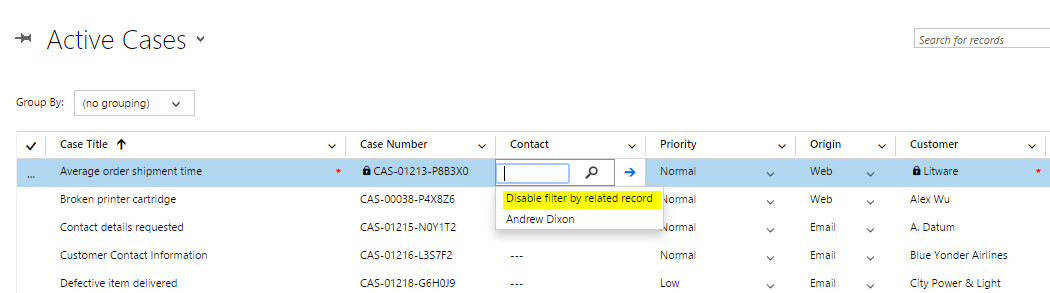
You can see the previous unfiltered view is filtered based on the condition we provided. Note: Since we checked the option to let users turn off filter, user gets an option to disable the filter as well.
Sub-grid – Configuring:
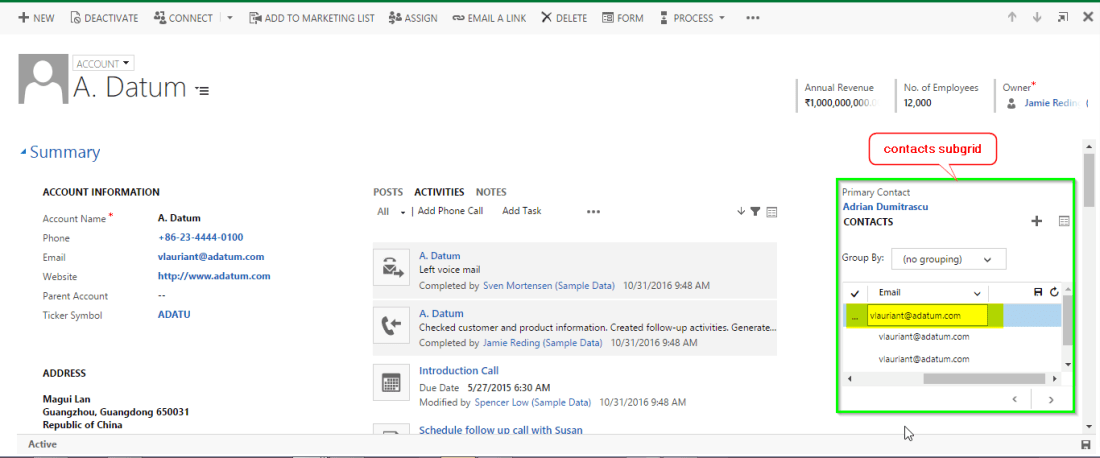
Step 1: Open the form and select the sub-grid, double click to change properties, click ‘Controls’ tab and add control.

contacts grid in the account is changed into the editable grid
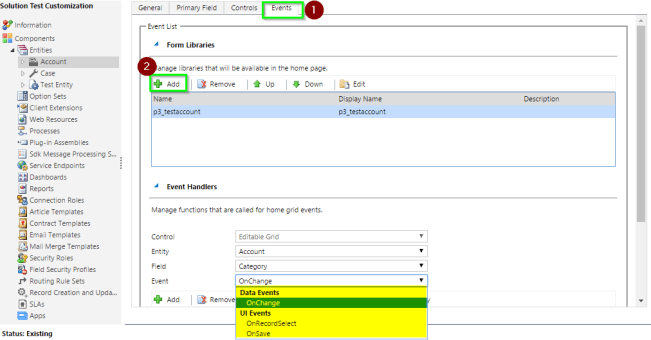
Adding scripts to Editable Grid:
Navigate to the ‘Events’ tab next to, add the script. The scripts can be registered for these three events
- OnChange
- OnREcordSelect
- OnSave
We will be posting a detailed article on customizing the grid and the grid events extensively, this post is already long enough, isn’t it? 🙂
Hope it helps, your feedbacks are most welcome!

One thought on “Dynamics 365 Editable Grid – A complete guide on configuration & features”