
The Evolution of Dynamics 365 is in its peak with storming features of Editable Grid, Power Apps, ERP in one place etc., Concentrating on the power of UI based interactive designs Microsoft has its own place in the trending market and they have proved it once more through the Visual Business Process Flows, Business Rules and Site Map editor in the latest version.
Until December 2016 release of Dynamics CRM the XML Sitemap is edited through Solution XML edition or through a popular used tool of “XRMToolBox” but now Microsoft has a built in Sitemap where we can visually view the changes, edit the sitemap, drag and drop functionality and Publishing the edited sitemap.
Prerequisite:
- Knowledge about Dynamics CRM
- Knowledge about the Security roles of Dynamics CRM.
Steps to edit the Sitemap of Dynamics CRM:
- Login to Dynamics CRM.
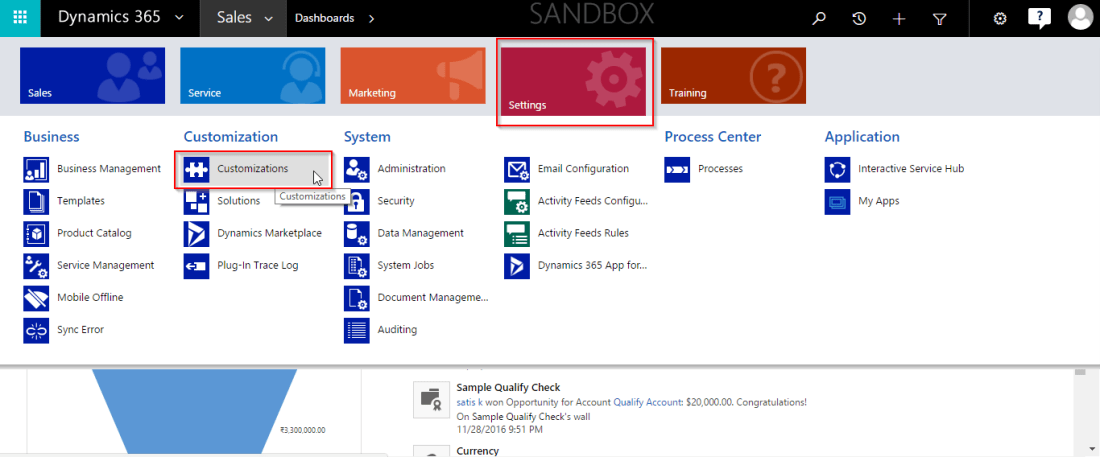
- Navigate to the “Settings -> Customizations” as shown in the figure
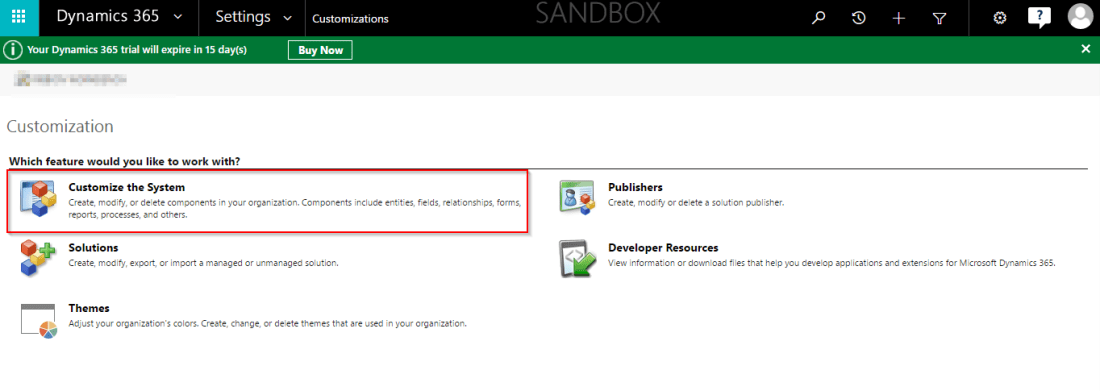
- Click on the “Customize the System” tab as shown in the figure
- In the Solution, window navigate to the “Client Extensions” in the left pane as shown in the figure
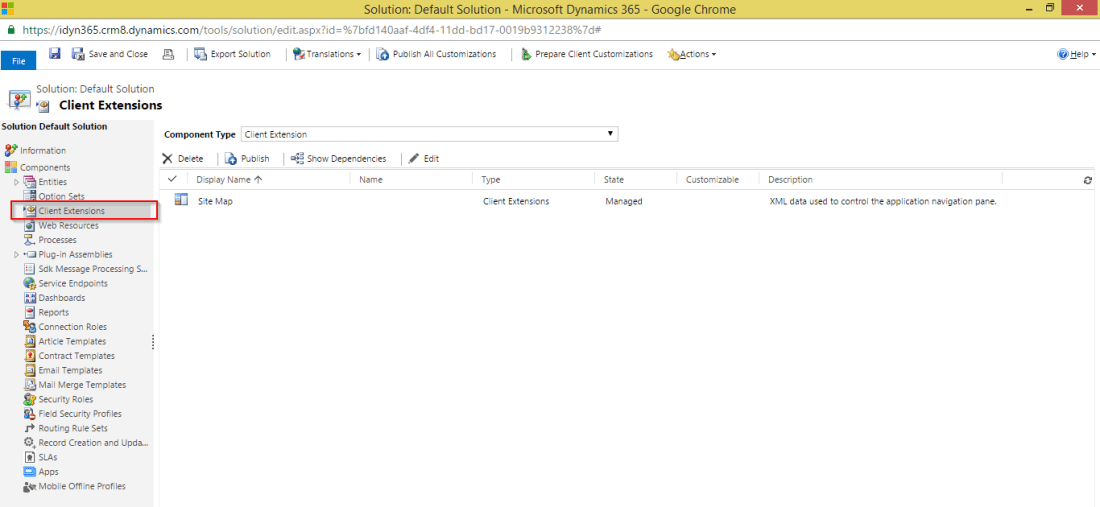
- Click on the “Site Map” in the right area.
- Click on the “Edit” button.
- A Visual editor will be displayed as shown the figure with the Visual Replication of the Site Map of the current instance
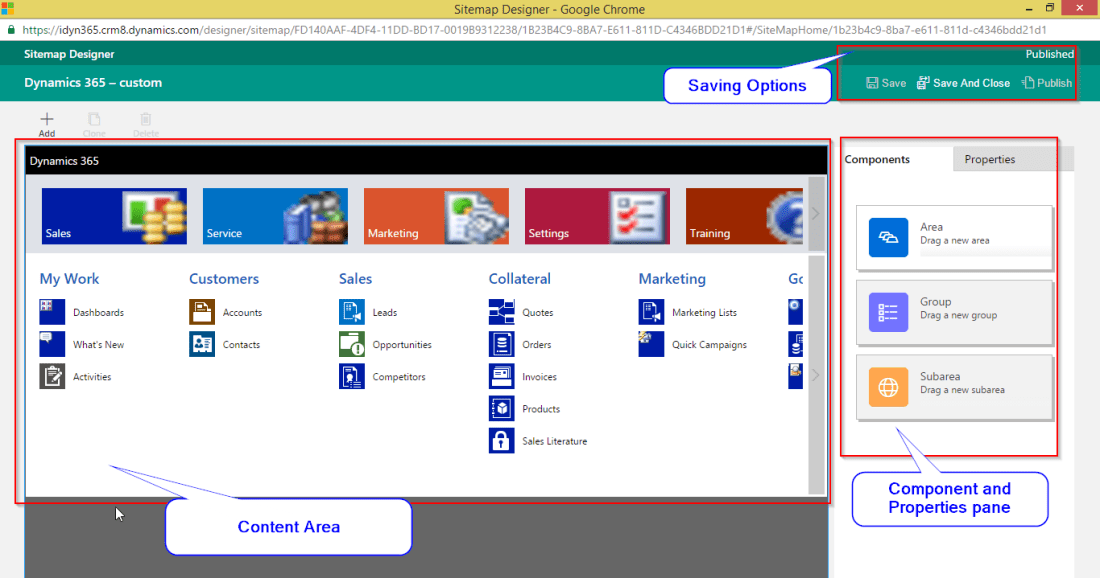
- Click on the Area in the Components pane and drag to the content area as shown in the below figure

- Add the group under the Area which we have dragged named as “Testing” as shown below
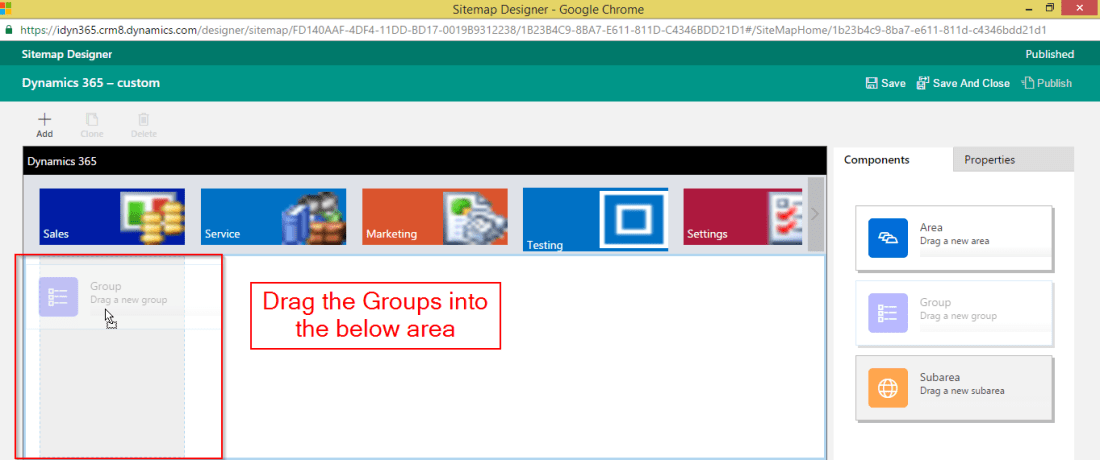
- Enter the properties of the group such as the title of the Group.
- Now drag the “Sub Area” component under the dragged area and fill the details as shown in the fig.
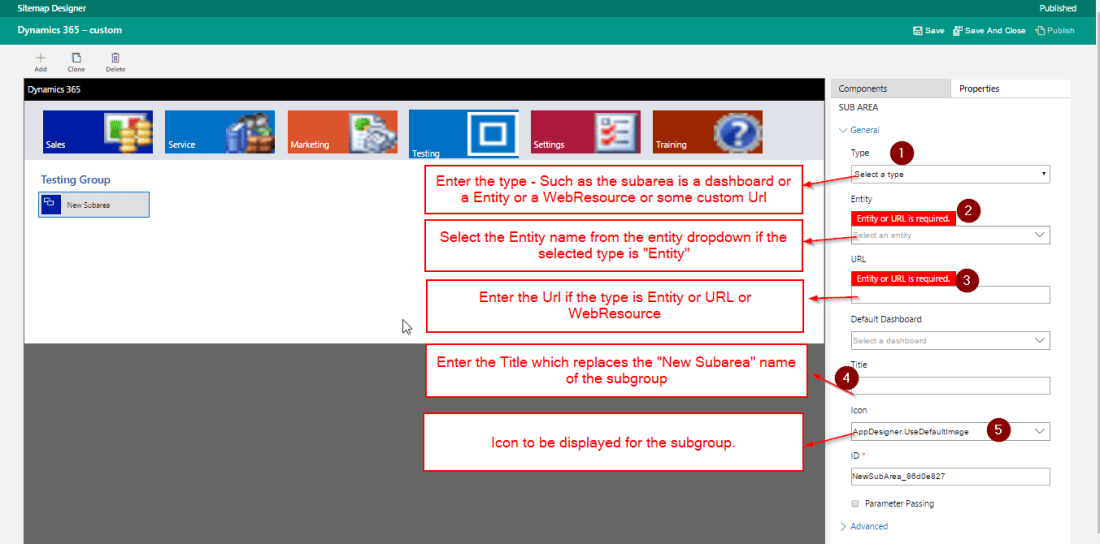
- Type – There are 5 types of type
- Select a type – Where all the down fields Entity, Dashboard, URL, Title, Icons all become editable
- Dashboard – Entity field and the URL field becomes read only and you can select the default dashboard from the “Default Dashboard” field.
- Entity – Here you can select the Entity from the “Entity” dropdown field and the Default Dashboard and URL becomes read only.
- Web Resource – You can select the Web Resource from the “URL” field drop-down and the Entity and Default Dashboard fields becomes read only.
- URL – The URL field becomes a text field where you can enter the URL of the Custom Page.
In Advanced Tab of the Sub Area, there are the following details
- Privileges – Based on which the Sub Area is displayed.
- For Example, if we select the Entity Account in the Entity Dropdown in the General Tab and in the Privileges Dropdown (Advanced Tab) select the Entity “Account”. Now go to the Security role and select the sales person role and revoke the access for “Account” entity and now login into Dynamics CRM with the Sales Person Login – You will not be able to view the “Account” subarea.
- More Titles
- More Descriptions
- SKU’s – For Determining the Edition of MS CRM. For more information please visit https://msdn.microsoft.com/en-us/library/gg327859.aspx
- Client – For Outlook client Availability
- Offline Availability – Available during Mobile Offline
- Now click on “Save” Button in the Top right corner and Click on “Publish” button.
- Click on “Save and Close” to save the sitemap and close.
Hope it helps you!!!!
Happy Learning!!
Arjun Raj Vijayan
Associate Consultant, Hitachi Solutions India Pvt Ltd.,

Thaanks for writing this
LikeLike
Thank you, glad you liked it
LikeLike